Welcome to the comprehensive guide for mastering heat press operations. This manual covers essential setup, safety, and creative techniques for optimal results in heat transfer projects.
1.1 What is a Heat Press Machine?
A heat press machine is a versatile tool designed for transferring designs onto various materials like fabric, ceramics, and metal. It uses high temperatures and pressure to permanently bond images from transfer papers or vinyl. Controlled by a microprocessor, it offers precise temperature and time adjustments, making it ideal for sublimation, plastisol, and heat transfer applications. Its touch control panel ensures easy operation and accuracy.
1.2 Importance of Using a Heat Press Manual
A heat press manual is essential for understanding machine features, troubleshooting, and safety guidelines. It provides step-by-step instructions for setup, operation, and maintenance, ensuring optimal performance. The manual helps users achieve professional results by guiding temperature, pressure, and time settings for various materials. It also highlights safety precautions to prevent accidents and prolong machine lifespan, making it a crucial resource for both beginners and experienced users.
1.3 Safety Guidelines for Operating a Heat Press
Always allow the machine to cool before storing and avoid touching hot surfaces. Use heat-resistant gloves and ensure proper ventilation. Keep loose clothing and long hair tied back. Never leave the heat press unattended, and keep children away. Follow the manual’s safety instructions to prevent accidents and prolong machine lifespan.
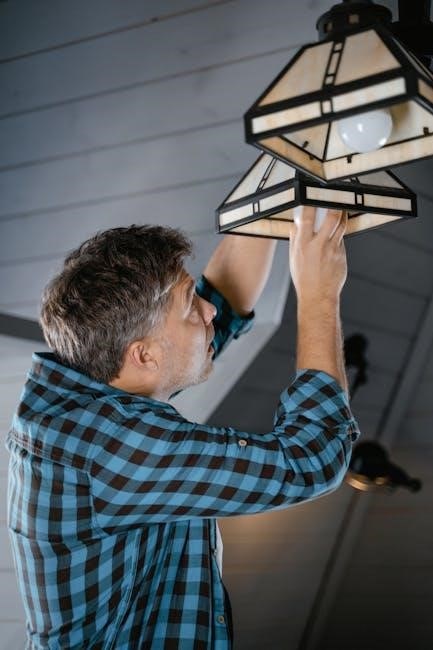
Setting Up Your Heat Press Machine
Begin by unboxing and inspecting the machine for damage. Assemble according to the manual, ensuring stable placement on a heat-resistant surface. Connect the power and perform the initial test run to ensure proper function before use.
2.1 Unboxing and Initial Inspection
Start by carefully unboxing the heat press machine, ensuring all components are included. Inspect each part for damage or wear, paying attention to the heat platen, pressure knob, and electrical connections. Verify that accessories like the user manual, power cord, and additional attachments are present. This step ensures readiness for assembly and safe operation.
2.2 Assembly and Placement of the Machine
Place the heat press on a sturdy, flat surface, ensuring good ventilation. Attach any additional accessories like mug or cap presses according to the manual. Align and secure all components tightly. Double-check the platen alignment and pressure knobs. Connect any optional attachments, then verify the machine’s stability. Ensure all parts are properly assembled before powering on for safe and efficient operation.
2.3 Connecting the Machine and Initial Power-On
Connect the heat press to a suitable power source, ensuring the voltage matches the machine’s requirements. Plug in the power cord and turn on the switch. Allow the machine to power up and perform its initial self-check. Set the default temperature and timer as per the manual. Ensure all lights and displays function properly. Let the machine heat up to the desired temperature before first use. Always follow safety guidelines during initial power-on.

Understanding Heat Press Components
The heat press consists of a heat platen, temperature and time controls, pressure adjustment mechanisms, and specialized platens for various materials like mugs and caps, ensuring precise and safe transfers.
3.1 Heat Platen Size and Types
The heat platen is a crucial component, available in sizes like 38x38cm or 40x60cm. Types include standard, mug, and cap platens, each designed for specific materials. Ensure the platen matches your project needs for even heat distribution. Proper alignment and maintenance are essential for longevity and optimal performance. Always refer to the manual for size recommendations and care tips.
3.2 Temperature and Time Controls
Accurate temperature and time adjustments are vital for successful heat transfers. Set temperatures between 180-210°C for materials like cotton or polyester. Time settings vary from 10-300 seconds, depending on transfer types. Digital controls offer precise adjustments, ensuring consistent results. Always refer to the manual for specific settings to avoid overheating or underheating, maximizing durability and quality of your projects;
3.3 Pressure Adjustment and Platens
Proper pressure adjustment ensures even heat distribution and prevents damage. Use the pressure knob to adjust firmness, ensuring it matches material thickness. Platens are heat-resistant and coated with Teflon for durability. Regularly clean platens to maintain performance and prevent transfer sticking. Adjust pressure gently to avoid over-tightening, which can warp the machine or damage materials during pressing.
Operating the Heat Press
Operating a heat press requires precise temperature, time, and pressure settings. Adjust according to material type, ensuring optimal transfer. Follow manufacturer guidelines for best results and safety.
4.1 Setting the Temperature for Different Materials
Setting the correct temperature is crucial for successful heat transfer. Cotton fabrics typically require 300-350°F, while polyester needs lower temperatures (250-300°F) to prevent scorching. Sublimation materials often require higher temperatures, around 400°F. Always reference the manufacturer’s guidelines for specific material recommendations. Using a temperature tester can ensure accuracy, preventing under-heating or over-heating issues during the transfer process.
4.2 Adjusting Time and Pressure for Optimal Results
Adjusting time and pressure ensures precise heat transfer. Thicker materials like polyester require longer press times (up to 30 seconds) and higher pressure, while delicate fabrics need shorter times (15-20 seconds) and lighter pressure. Use the pressure knob to achieve even distribution, and monitor the countdown timer for consistent results. Always test settings on scrap material first to avoid damage.
4.3 Step-by-Step Process for Applying Transfers
Print your design on sublimation paper using a printer. 2. Preheat the press to the recommended temperature (180-210°F). 3. Place the item (e.g., t-shirt, mug) on the platen. 4. Position the printed paper face-down on the item. 5. Set the timer (15-30 seconds) and press start. 6. Allow the press to cool slightly before removing the item and paper. Results are immediate and durable.
Accessories and Attachments
Enhance your heat press versatility with attachments like mug, cap, and plate presses. Additional tools include sublimation paper, vinyl cutters, and heat-resistant tapes for diverse projects.
5.1 Mug Press Attachments
Mug press attachments enable precise sublimation on ceramics. Designed for 11oz mugs, these accessories ensure even heat distribution. Use sublimation paper, align designs carefully, and set temperatures between 180-200°C for vibrant results. Ideal for customizing mugs, this attachment enhances productivity and creativity in heat transfer projects.
5.2 Cap Press Attachments
Cap press attachments are designed for sublimation on hats and caps. The curved design ensures a perfect fit, accommodating various cap sizes and styles. Ideal for cotton, polyester, and blends, these attachments require temperatures between 150-180°C for optimal results. Easy to use, they ensure even heat distribution and durability, making them perfect for both professional and DIY projects. Secure locking mechanisms guarantee a proper seal, ensuring vibrant designs every time.
5.3 Additional Tools for Sublimation and Heat Transfer
Essential tools enhance heat press efficiency and creativity. Sublimation paper ensures vibrant transfers, while heat-resistant tape secures designs. Thermal tape protects surfaces from heat damage. Calibration tools maintain machine accuracy, and a Teflon sheet prevents sticking. These accessories simplify the process, ensuring professional-quality results for various materials and projects, from apparel to ceramics. They are indispensable for achieving optimal sublimation and heat transfer outcomes.
Maintenance and Troubleshooting
Regular maintenance ensures optimal performance. Clean the platen, check temperature settings, and address common issues promptly to extend machine lifespan and prevent operational disruptions effectively.
6.1 Cleaning and Calibrating the Heat Press
Regularly clean the heat platen with a soft cloth to prevent residue buildup. Ensure the machine is cool before cleaning to avoid damage. Check temperature accuracy and recalibrate if necessary for consistent results. Avoid harsh chemicals that may damage surfaces. Proper calibration ensures precise temperature and pressure control, essential for optimal heat transfer performance.
Refer to the manual for specific calibration steps, as procedures may vary by model. Always allow the machine to cool completely before storage or maintenance to prevent accidental burns or damage. Regular maintenance extends the lifespan and ensures reliable operation of your heat press machine.
6.2 Common Issues and Solutions
Common issues include uneven pressure, incorrect temperature settings, and residue buildup. Solutions involve recalibrating the machine, adjusting pressure knobs, and cleaning the platen regularly. Ensure proper alignment of items and avoid overheating. Refer to the manual for troubleshooting guides specific to your model for optimal performance and to resolve any operational difficulties effectively.
Creative Projects with a Heat Press
Unleash your creativity with custom t-shirts, sublimation on mugs, and heat transfers on hats. Explore crafting unique gifts and personalized items with versatile heat press techniques.
7.1 Custom T-Shirts and Apparel
Design your own custom t-shirts and apparel using sublimation or heat transfer vinyl. Print your design on sublimation paper, set the heat press to 180-200°C, and press for 2-3 minutes. Adjust pressure for even application. Use protective paper to prevent ghosting. Achieve vibrant, long-lasting results for personalized gifts or unique fashion statements. Explore endless creative possibilities with custom heat press designs.
7.2 Sublimation on Mugs and Ceramics
Create vibrant designs on mugs and ceramics using sublimation. Print your design on sublimation paper, place it on the mug, and use a mug press attachment. Set the heat press to 180-200°C and press for 2-3 minutes. Ensure even pressure for a durable finish. Achieve professional-quality, full-color transfers perfect for personalized gifts or custom merchandise. Follow manufacturer guidelines for optimal results.
7.3 Heat Transfer on Hats and Caps
Apply vibrant designs to hats and caps using heat transfer vinyl. Attach the cap press accessory and set the temperature between 180-200°C. Press for 10-15 seconds with medium pressure. Ensure proper alignment and smooth fabric for best results. Follow the manual for specific settings to achieve long-lasting, professional finishes. Perfect for customizing headwear with intricate designs.
Heat Press Machine Models and Comparison
Explore top models like Hotronix, MAXX, and HTVRONT, featuring digital controls, varied platen sizes, and adjustable pressure systems. Compare their unique features to find the best fit for your needs.
8.1 Popular Heat Press Models (Hotronix, MAXX, HTVRONT)
Discover the top heat press models: Hotronix, known for durability and advanced features; MAXX, offering user-friendly interfaces; and HTVRONT, praised for versatility. Each model caters to different needs, from professional-grade setups to home-based crafting, ensuring high-quality transfers with precise temperature and pressure controls. Explore their unique features to choose the best fit for your creative projects.
8.2 Features and Differences Between Models
Each heat press model offers distinct features: Hotronix excels with its digital controls and robust build, MAXX focuses on ease of use and portability, while HTVRONT stands out for its versatility and interchangeable attachments. Differences include platen sizes, temperature ranges, and additional accessories like mug or cap presses, ensuring varied applications for different crafting needs and professional demands.
Downloading and Referencing User Manuals
Heat press manuals are available online for models like Hotronix, MAXX, and HTVRONT. They include step-by-step guides, troubleshooting, and material settings to ensure optimal machine performance and safety.
9.1 Finding the Right Manual for Your Heat Press
To find the correct manual, identify your heat press model and visit the manufacturer’s official website; Popular brands like Hotronix, MAXX, and HTVRONT offer downloadable PDF manuals. Use search engines with keywords like “HTVRONT heat press manual” or “Hotronix MAXX manual.” Ensure the manual matches your machine’s model for accurate instructions and safety guidelines.
9.2 How to Use the Manual Effectively
Start by reading the manual thoroughly to understand your heat press’s features and operation. Focus on key sections like setup, temperature settings, and troubleshooting. Refer to safety guidelines to ensure safe usage. Use the manual to identify compatible materials and optimal settings. Keep it handy for quick reference during projects and maintenance. Download the latest version from the manufacturer’s website for updated information.
Mastery of heat press operations begins with understanding safety, setup, and creative techniques. Troubleshoot effectively and unlock endless possibilities for sublimation and heat transfer projects with confidence.
10.1 Final Tips for Mastering Heat Press Operations
Always refer to your heat press manual for specific settings and troubleshooting. Calibrate regularly for consistent results. Adjust temperature and pressure based on materials. Clean and maintain the machine to extend its lifespan. Experiment with creative projects to explore full potential. Stay safe by following guidelines and avoiding hot surfaces. Happy pressing!
10.2 Encouragement to Explore More Creative Possibilities
Embrace the endless creativity of heat pressing! From custom apparel to personalized mugs, the possibilities are vast. Experiment with various materials and techniques to unlock new designs. Whether for hobbies or business, this versatile tool empowers you to bring unique ideas to life. Keep exploring and enjoy the creative journey!