Anytone AT778UV Manual: A Comprehensive Guide
This manual details the AT778UV mobile radio, a PDF document created November 9, 2015, by Qixiang Electron Science & Technology.
It covers features, operations, and troubleshooting, utilizing tools like Chirp for programming, and offers 44 pages of detailed guidance;
The Anytone AT778UV is a versatile mobile radio, gaining popularity among amateur radio enthusiasts. This user manual, documented as a PDF created on November 9, 2015, by Qixiang Electron Science & Technology, serves as a comprehensive resource for both beginners and experienced users. It’s designed to unlock the full potential of this powerful communication device.
The AT778UV supports multiple frequency bands and offers a wide range of features, including the ability to program channels manually or via software like Chirp. Understanding its functionalities, as detailed within this 44-page guide, is crucial for effective operation. This manual will guide you through setup, programming, and advanced features, ensuring a seamless experience with your new radio.
The document ID is uuid:D1F19913A586E5119F3CEBB4D465BD34.
Key Features and Specifications
The Anytone AT778UV boasts a robust feature set, detailed in the November 9, 2015, user manual (PDF format, version 1.4). Key capabilities include support for multiple frequency bands, allowing for diverse communication options. The radio offers both manual keypad programming and compatibility with Chirp software for streamlined channel configuration.
Specifications, as outlined in the 44-page document, cover frequency range, power output levels, and physical dimensions. The manual, produced by Qixiang Electron Science & Technology, also details the radio’s bandwidth selection options (NAR, MID, WID) and transmit shift adjustment features. It’s a powerful, versatile radio, and this manual provides the specifics needed for optimal performance. Document ID: uuid:D1F19913A586E5119F3CEBB4D465BD34.

Getting Started with Your AT778UV
Begin with the 44-page PDF manual (created 11/09/2015) for unboxing, setup, and initial operation of your new AT778UV mobile radio.
Unboxing and Initial Setup
Upon receiving your Anytone AT778UV, carefully inspect the packaging for any signs of damage during transit. The box should contain the radio unit itself, a DC power cable designed for mobile operation, and potentially a mounting bracket for vehicle installation.
Refer to the comprehensive 44-page user manual (dated November 9, 2015) for a detailed inventory list and visual diagrams. Before powering on, ensure all components are present. Initial setup involves connecting the DC power cable to a suitable 13.8V DC power source.
It’s recommended to familiarize yourself with the radio’s physical layout, including the keypad, display screen, and various ports, as outlined in the PDF manual. Proper antenna connection is crucial for optimal performance; consult the manual for antenna impedance matching guidelines.
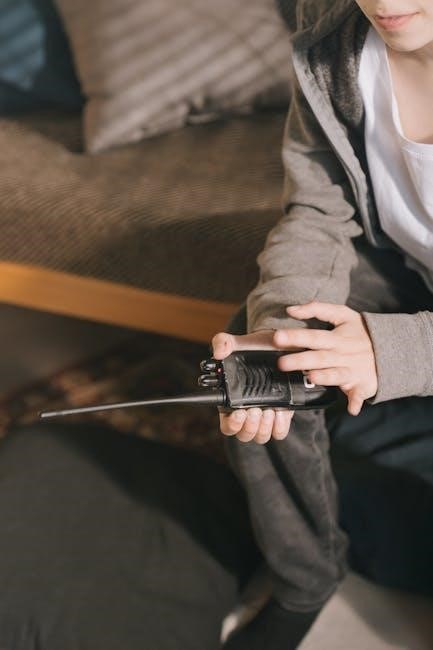
Powering On and Basic Operations
To power on the Anytone AT778UV, press and hold the power button located on the front panel. The radio will initiate a self-test sequence, displaying firmware information on the screen. Refer to the user manual, a PDF document created on November 9, 2015, for specific display messages.
Basic operations include navigating the menu system using the keypad and selecting channels. The rotary encoder allows for frequency adjustment and volume control. Utilize the ‘MON’ (Monitor) key to listen for activity on the current channel.
The ‘TALK’ key initiates transmission; ensure a properly connected antenna before transmitting. Familiarize yourself with the ‘BND’ (Bandwidth) and ‘SFT’ (Shift) keys for advanced functionality, as detailed within the 44-page manual.
Understanding the Display Interface
The Anytone AT778UV features a multi-line LCD display providing crucial operational information. This display, detailed in the November 9, 2015 user manual (a PDF document), shows the current frequency, channel number, operating mode (VFO or Memory), and signal strength.
Icons indicate various functions, such as transmit, receive, and selected bandwidth (NAR, MID, WID). Pay attention to the key lock indicator and battery level. The display also reflects settings adjusted via the keypad, like transmit shift.
Understanding these indicators, as outlined in the 44-page manual, is vital for effective operation. The display’s clarity aids in monitoring communication and configuring the radio’s settings.
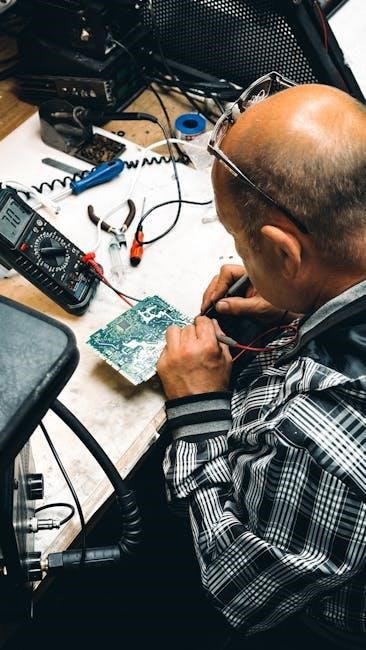
Programming the AT778UV
The AT778UV can be programmed via software, like Chirp, or directly through the keypad, as detailed in the November 2015 user manual.
Programming Methods (Software vs. Manual)
The Anytone AT778UV offers flexibility in programming, allowing users to choose between software-based methods and direct manual input via the keypad. Utilizing software, such as Chirp, generally provides a faster and more efficient way to program a large number of channels and settings, minimizing potential errors.
Software interfaces often present a visually organized structure, simplifying the process of configuring frequencies, offsets, and other parameters. Conversely, manual programming directly on the radio is valuable when a computer isn’t accessible or for making quick, individual adjustments.
The November 2015 user manual details both approaches, outlining the specific steps and considerations for each. Understanding the strengths of each method empowers users to select the most suitable technique based on their needs and circumstances.
Using Chirp Software for Programming
Chirp software presents a user-friendly interface for programming the Anytone AT778UV, streamlining the process of managing channels and settings. Before connecting, ensure you have the correct USB driver installed for seamless communication between your computer and the radio.
The software allows you to download the existing configuration from the radio, providing a backup and a starting point for modifications. You can then edit frequencies, power levels, and other parameters within Chirp’s intuitive environment.
After making changes, upload the updated configuration back to the AT778UV. Always double-check your settings before uploading to avoid potential issues. Refer to the AT778UV manual (created November 9, 2015) for specific Chirp configuration guidance.
Manual Programming via Keypad
The Anytone AT778UV allows direct programming through its keypad, offering a method independent of software like Chirp. Access the programming mode by pressing the ‘Menu’ button and navigating to the ‘Program’ option using the directional keys.
You’ll then input frequencies and settings manually, utilizing the numeric keypad and selecting options from the menu. This method requires careful attention to detail to avoid errors.
The user manual, dated November 9, 2015, provides a step-by-step guide to keypad programming, including explanations of each menu option. Remember to save your changes after each channel is programmed. While more time-consuming than software, keypad programming is useful when a computer isn’t available.
Understanding Channels and Memory
The AT778UV utilizes both regular and memory channels for storing frequencies. Effective organization and scanning are key to maximizing the radio’s communication capabilities.
Channel Storage and Organization
The Anytone AT778UV provides ample channel storage, allowing users to save frequently used frequencies for quick access. Proper organization is crucial for efficient operation, especially when dealing with numerous channels. Consider grouping channels by purpose – for example, local repeaters, simplex frequencies, or specific user groups.
Utilize the radio’s labeling feature to assign descriptive names to each channel, making identification easier in the field. This is particularly helpful when scanning through channels or quickly selecting a desired frequency. Regularly review and update your channel list, removing unused channels and adding new ones as needed.
Effective channel management enhances usability and ensures you can swiftly connect with the intended parties. Remember to back up your channel configurations using programming software like Chirp to prevent data loss.
Memory Channels vs. Regular Channels
The Anytone AT778UV distinguishes between regular channels and memory channels, offering different functionalities for storing frequencies. Regular channels are directly programmed and readily accessible, ideal for frequently used settings. Memory channels, however, provide a more robust storage option, allowing for saving complete channel configurations – including offset, tone, and power level.
This is particularly useful for repeaters, where preserving all settings is essential for seamless communication. Memory channels offer a degree of protection against accidental modification, ensuring your preferred settings remain intact.
Utilizing memory channels streamlines repeater access and minimizes setup time. Backing up these configurations via programming software is highly recommended to safeguard your customized settings.
Scanning Channels
The Anytone AT778UV’s scanning function allows for monitoring multiple channels for activity without manually switching between them; You can initiate a scan across a defined range of channels, or specifically scan programmed memory channels. The radio pauses on any channel exhibiting signal activity, allowing you to listen in.
Scan settings are customizable, including scan list selection and pause duration. Prioritized scanning can be configured, giving preference to specific channels.
Understanding scan behavior is crucial for efficient monitoring. The radio will resume scanning after a pre-set delay or when a transmission ceases. Properly configured scanning enhances situational awareness and ensures you don’t miss important communications.

Advanced Features and Functions
The AT778UV boasts talkaround, bandwidth selection (NAR, MID, WID), transmit shift adjustment, and a monitor function for versatile operation.
Talkaround Mode (Reverse Mode)
Talkaround mode, also known as reverse mode, on the Anytone AT778UV is a crucial function for direct communication, bypassing the need for a repeater. Essentially, it eliminates the repeater offset frequency, allowing you to transmit and receive on the same frequency.
This is particularly useful when a repeater is unavailable or when communicating with other radios in close proximity. The Reddit post regarding the AT-778UV specifically mentions a “Talk-Toggle” function, indicating a quick and easy way to activate this feature. Utilizing talkaround ensures clear, direct communication without relying on external infrastructure, enhancing the radio’s flexibility in various scenarios.
It’s a valuable tool for simplex operations and emergency situations.
Bandwidth Selection (NAR, MID, WID)
The Anytone AT778UV offers adjustable bandwidth settings – Narrowband (NAR), Middleband (MID), and Wideband (WID) – impacting audio clarity and signal occupancy. These settings determine the width of the frequency channel used for transmission and reception.
According to information sourced from a Reddit discussion about the AT-778UV, a dedicated “Bandwidth toggle” exists for quick adjustments between these modes. NAR is typically used for commercial and public safety communications, while WID offers broader audio but can cause interference. MID provides a compromise between the two.
Selecting the appropriate bandwidth ensures compatibility with other radios and optimizes signal quality.
Transmit Shift Adjustment
The Anytone AT778UV allows for transmit shift adjustment, crucial when using repeaters. This feature offsets the transmit frequency from the receive frequency, preventing interference with incoming signals on the same channel. Proper shift setting ensures smooth communication through the repeater system.
A Reddit discussion regarding the AT-778UV highlights a “Transmit Shift shortcut” (SFT) for quick access to this function. Incorrect shift values can lead to interference or prevent communication altogether.
Understanding and correctly configuring the transmit shift is vital for effective repeater operation. Consult your local repeater guidelines for the appropriate shift frequency for your area.
Monitor Function
The Anytone AT778UV’s Monitor function, also referred to as “MON” in a Reddit discussion, allows you to bypass the squelch circuit. This enables you to hear all activity on the current channel, even weak signals or those without a carrier. It’s invaluable for checking channel activity before transmitting, or verifying repeater access.
Activating the monitor function temporarily disables the tone decoding, allowing you to hear any signals present, regardless of PL/DPL tones. This is useful for diagnosing issues or confirming the presence of a carrier signal.
Use the monitor function cautiously, as continuous listening can be disruptive and drain battery life.
Using the AT778UV for Communication
The AT778UV supports both direct simplex communication and repeater setups, alongside cross-band repeat capabilities, offering versatile options for radio connectivity.
Setting Up and Using Repeaters
Utilizing repeaters with the Anytone AT778UV significantly extends your communication range. Proper setup involves programming the correct repeater frequency, offset (transmit shift), and tone (CTCSS/DCS) into a memory channel.
The radio’s transmit shift adjustment feature is crucial for aligning with the repeater’s input frequency. Ensure the offset direction (plus or minus) matches the repeater’s configuration.
Understanding the ‘Talkaround’ or ‘Reverse’ mode is also vital; it bypasses the repeater, allowing direct communication with other radios within range. The AT778UV’s keypad allows for quick access to these settings, streamlining repeater usage.
Always verify repeater access requirements and adhere to local regulations.
Direct (Simplex) Communication
Direct, or simplex, communication with the Anytone AT778UV involves transmitting and receiving on the same frequency without utilizing a repeater. This mode is ideal for short-range conversations between radios within line-of-sight.
To establish simplex communication, select a shared frequency and ensure both radios are set to the same channel and bandwidth (NAR, MID, WID). The ‘Talkaround’ or ‘Reverse’ mode can be utilized to eliminate any repeater offset that might be programmed.
Monitoring the channel before transmitting is recommended to avoid interference. Adjusting the squelch level can improve receive clarity in noisy environments.
Remember to adhere to all applicable regulations regarding simplex operation.
Cross-Band Repeat
The Anytone AT778UV’s cross-band repeat feature allows communication between radios operating on different frequency bands – for example, 2 meters and 70 centimeters. This functionality effectively extends the range of your communication by utilizing the radio as a temporary repeater.
To activate cross-band repeat, you must configure the radio to receive on one band and simultaneously re-transmit on another. This involves setting appropriate transmit and receive frequencies, along with the correct offset.
Careful consideration of frequency allocation and potential interference is crucial when using this mode. Ensure compliance with local regulations and avoid disrupting existing communications.
Proper setup is essential for successful cross-band repeating.

Troubleshooting Common Issues
This section addresses typical problems like power failures, transmission difficulties, and receive quality issues with the AT778UV radio.
Solutions and diagnostic steps are provided to resolve these common operational challenges effectively.
No Power/Radio Won’t Turn On
If your Anytone AT778UV fails to power on, begin with the basics. Ensure the power cable is securely connected to both the radio and a functioning power source – a vehicle’s cigarette lighter or a suitable DC power supply.
Verify the fuse within the radio’s power connection is intact. A blown fuse is a common culprit. If replacing the fuse doesn’t resolve the issue, inspect the DC power plug for any physical damage or loose connections.
Confirm the radio’s power switch is fully engaged. Sometimes, a partial switch activation can prevent power-up. If these steps fail, a more in-depth internal inspection by a qualified technician may be necessary to diagnose potential component failures.
No Transmit/Low Power
Experiencing no transmit or low power output on your Anytone AT778UV requires systematic troubleshooting. First, confirm you aren’t on a receive frequency or a channel programmed without transmit permissions.
Check the transmit power setting within the radio’s menu. Ensure it’s set to High power, not Low. Verify the antenna is correctly connected and undamaged; a poor antenna connection significantly reduces transmission range.
Inspect the microphone for proper connection and functionality. A faulty microphone can prevent keying the transmitter. If issues persist, examine the radio’s internal settings related to transmit power and potential squelch settings that might be interfering with transmission.
Receive Issues/Poor Audio Quality
Poor reception or distorted audio on your Anytone AT778UV can stem from several causes. Begin by verifying the squelch level isn’t set too high, blocking weak signals. Adjust the squelch to a lower setting to capture more transmissions, but be mindful of increased noise.
Ensure the correct frequency and mode are selected for the desired signal. A mismatched setting will result in no audio or garbled reception. Check the antenna connection; a loose or damaged antenna drastically impacts receive sensitivity.
Experiment with different bandwidth settings (NAR, MID, WID) to optimize signal clarity. Finally, confirm there are no external interference sources nearby affecting the radio’s performance.

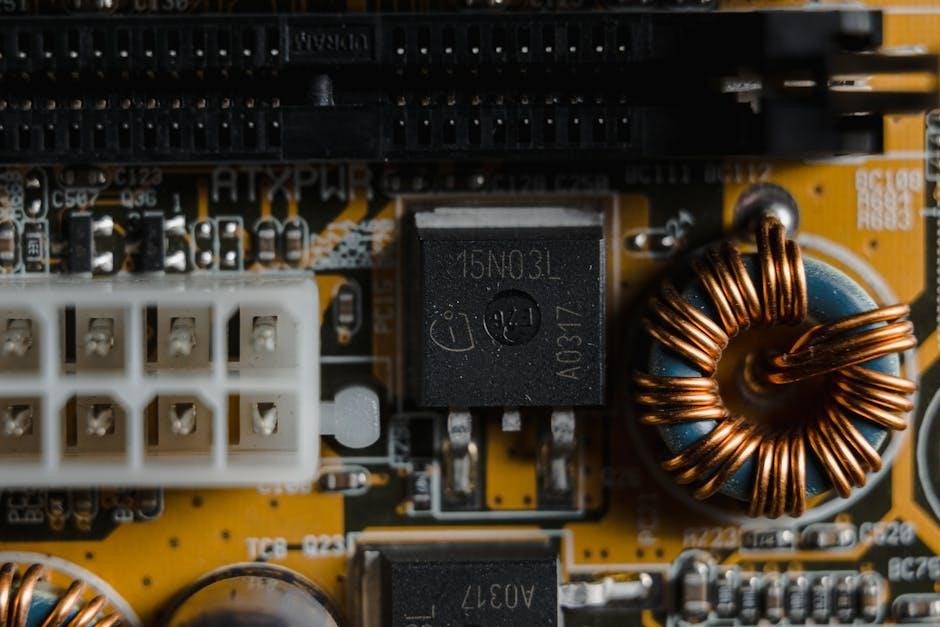
Technical Specifications in Detail
The AT778UV manual details PDF version 1.4 specifications, including frequency ranges and power output.
Dimensions, weight, and supported bands are outlined within the 44-page document created by Qixiang Electron Science & Technology.
Frequency Range and Supported Bands
The Anytone AT778UV manual, a PDF document version 1.4, specifies comprehensive frequency range coverage for versatile communication. This radio supports a wide array of bands, enabling operation across various frequencies crucial for both amateur and professional use.
Detailed within the 44-page manual created by Qixiang Electron Science & Technology, users will find precise frequency specifications for VHF and UHF operations. The radio’s ability to transmit and receive across these bands is a key feature, allowing for compatibility with diverse radio systems and repeaters.
Understanding these supported bands is essential for proper programming and operation, ensuring optimal performance and adherence to local regulations. The manual provides the necessary information to configure the radio for specific frequency allocations, maximizing its utility in different scenarios.
Power Output Levels
The Anytone AT778UV manual, a detailed PDF resource created on November 9, 2015, outlines the radio’s adjustable power output levels for optimized performance and range. Understanding these settings is crucial for efficient communication and conserving battery life.
Qixiang Electron Science & Technology’s documentation specifies various power levels, typically ranging from low, medium, to high, allowing users to tailor transmission strength to their specific needs. Lower power settings are ideal for local communication, while higher settings extend the radio’s reach.
The 44-page manual provides guidance on selecting appropriate power levels based on distance, signal conditions, and regulatory requirements. Proper power management ensures clear transmissions and minimizes interference, contributing to a reliable communication experience.
Dimensions and Weight
The Anytone AT778UV manual, a comprehensive PDF document dated November 9, 2015, from Qixiang Electron Science & Technology, details the physical specifications of the radio. This includes precise measurements of its dimensions and overall weight, vital for installation and portability.
Understanding these specifications is essential for determining suitable mounting locations within vehicles or other environments. The manual provides these details to ensure users can comfortably handle and integrate the AT778UV into their communication setups.
The 44-page guide offers exact dimensions, typically expressed in millimeters or inches, and weight in kilograms or pounds, allowing for informed decisions regarding placement and transport.

Safety Information and Compliance
The AT778UV manual, a PDF from Qixiang Electron Science & Technology, outlines RF exposure guidelines, operating temperatures, and warranty details for safe use.
RF Exposure Guidelines
Understanding and adhering to Radio Frequency (RF) exposure guidelines is crucial when operating the Anytone AT778UV. The user manual, a PDF document produced by Qixiang Electron Science & Technology, details important safety information regarding RF energy and potential health effects.
To ensure compliance and minimize exposure, maintain a safe distance between your body and the radio during transmission. The manual likely references specific guidelines established by regulatory bodies, such as those concerning Specific Absorption Rate (SAR) limits.
Always utilize approved accessories, like appropriate antennas, and avoid operating the radio at excessive power levels for prolonged periods. Proper antenna placement and usage are vital for minimizing RF exposure. Consult the full manual for detailed instructions and recommended operating practices to prioritize your safety.
Operating Temperature Range
The Anytone AT778UV, detailed in the Qixiang Electron Science & Technology user manual (a PDF document created November 9, 2015), has specified operating temperature limitations. These limits are critical for ensuring the radio functions reliably and avoids potential damage from extreme heat or cold.
Operating the AT778UV outside of its designated temperature range can lead to reduced performance, shortened lifespan, or even permanent failure. The manual will clearly state the acceptable minimum and maximum temperatures for both operation and storage.
Avoid exposing the radio to direct sunlight for extended periods or leaving it in vehicles during hot weather. Similarly, protect it from freezing temperatures. Adhering to these guidelines will maintain optimal performance and longevity.
Warranty Information
The Anytone AT778UV’s warranty details, as outlined in the Qixiang Electron Science & Technology user manual (dated November 9, 2015), are crucial for understanding your rights as a purchaser. This section specifies the duration of the warranty coverage, typically a defined period from the date of original purchase.
The warranty generally covers defects in materials and workmanship under normal use. However, it typically does not cover damage resulting from misuse, accidents, unauthorized modifications, or acts of nature.
To make a warranty claim, you’ll likely need to provide proof of purchase and return the radio to an authorized service center. Carefully review the manual for specific instructions and limitations.