Safety Instructions
Always read the manual thoroughly before operating the Craftsman table saw. Wear safety glasses and keep loose clothing tied back. Ensure the workspace is clean and well-lit. Never leave the saw unattended while running. Always use the blade guard and keep children away. Avoid overreaching and maintain firm control of workpieces. Follow all safety precautions to minimize injury risks.
- Keep the blade guard down during through-sawing cuts.
- Use push sticks or blocks for narrow stock ripping.
- Avoid freehand cutting without proper support devices.
- Never operate the saw with damaged or dull blades.
1.1 General Safety Precautions
Always read the manual thoroughly before operating the Craftsman table saw. Wear safety glasses and keep loose clothing tied back. Ensure the workspace is clean and well-lit. Never operate the saw with damaged or dull blades. Keep children and bystanders away from the work area. Maintain firm control of workpieces at all times to ensure safe operation.
- Ensure proper assembly and alignment before use.
- Avoid overreaching or stretching while cutting materials.
- Keep the work area free from clutter and debris.
1.2 Table Saw Safety Tips
Always use the blade guard and keep it in place during operation. Use push sticks or blocks for ripping narrow stock to maintain control. Ensure proper alignment of the fence and blade before cutting. Avoid overreaching or stretching while operating the saw. Keep loose clothing and long hair tied back to prevent accidents.
- Never operate the saw with damaged or dull blades.
- Always use the rip fence for straight cuts.
- Keep the workpiece firmly against the fence or miter gauge.
1.3 Emergency Procedures
In case of an emergency, immediately turn off the power and unplug the saw. Never attempt to stop the blade with your hands. If a kickback occurs, release the workpiece and switch off the motor. Keep a fire extinguisher nearby and ensure proper ventilation to prevent dust buildup. Always stay calm and follow safety protocols.
- Turn off the power source immediately in case of an accident.
- Never touch the blade while it is moving or hot.
- Evacuate the area if excessive smoke or sparks occur.

Installation and Assembly
Start by unboxing and inspecting all components. Follow the manual for assembling the table saw, ensuring stability and proper alignment. Secure the motor and attach the rip fence tightly. Double-check all bolts and connections before powering on. Ensure the work surface is level and clear of debris for safe operation.
- Place the saw on a sturdy, flat surface.
- Tighten all bolts and screws firmly.
- Connect the power source carefully.
2.1 Unboxing and Initial Setup
Start by carefully unboxing the table saw and inspecting all components for damage. Ensure all parts, including the saw, fence, and miter gauge, are included. Place the saw on a level surface and secure it firmly. Connect the power source and review the manual before proceeding with assembly or operation.
2.2 Assembling the Table Saw
Begin by unboxing and inventorying all components. Attach the rip fence and miter gauge according to the manual. Align the fence with the blade and secure it tightly. Install the blade guard and ensure proper alignment. Lubricate moving parts as specified. Double-check all connections and ensure the saw is level before first use.
- Follow the manual for precise assembly steps.
- Ensure all parts are securely tightened.
- Verify blade alignment for accurate cuts.
2.3 Pre-Operation Checklist
Before operating, ensure the table saw is properly assembled and level. Check the blade guard and fence alignment. Verify blade sharpness and ensure all safety devices are functional. Clear the work area of debris and ensure proper lighting. Consult the manual for specific pre-operation checks tailored to your model.
- Inspect the blade for damage or dullness.
- Ensure the rip fence is securely locked.
- Confirm the miter gauge is aligned correctly.

Operation and Usage
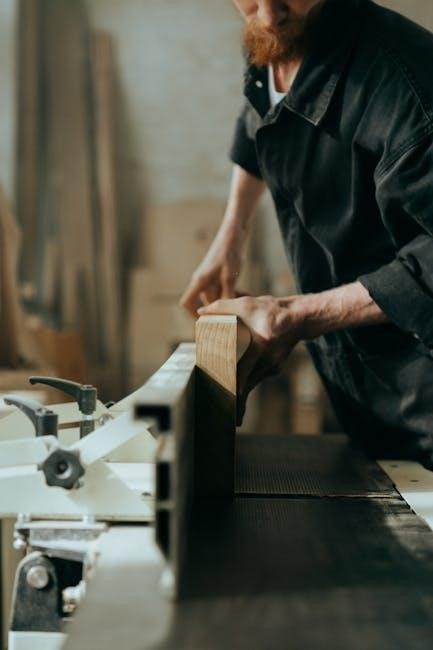
Start the saw gradually and maintain steady control during cuts. Use the rip fence or miter gauge for precise alignment. Always keep the blade guard in place for safety. Ensure workpieces are firmly supported to avoid kickback. Make smooth, consistent passes to achieve accurate results.
3.1 Getting Started with the Table Saw
Read the manual thoroughly before use. Inspect the saw for damage and ensure all parts are securely assembled. Align the blade and fence, then test the saw with scrap wood. Familiarize yourself with controls, such as the power switch and bevel locking lever. Always start with a small, manageable project.
- Ensure proper blade installation and alignment.
- Check fence and miter gauge accuracy.
- Test the saw’s operation before cutting materials.
3.2 Basic Cutting Techniques
Master basic cutting techniques by aligning the fence with the blade for accurate rip cuts. Use the miter gauge for precise angle cuts. Always hold work firmly against the fence or gauge. Apply steady, consistent feed pressure to maintain control and achieve clean cuts.
- Align the fence parallel to the blade for rip cuts.
- Use the miter gauge for angled or crosscuts.
- Keep hands away from the blade during operation.
- Apply consistent feed pressure for smooth results.
3.3 Advanced Features and Settings
Utilize the Exact-I-Cut adjustment for precise blade alignment. Engage the bevel locking lever for accurate angled cuts. Adjust the rip fence for wider materials and use the quick-release mechanism for efficient setups. Explore variable speed settings for different blade types and materials to optimize cutting performance and extend tool life.
- Use the Exact-I-Cut system for blade alignment accuracy.
- Engage the bevel locking lever for precise angle adjustments.
- Adjust the rip fence for handling wide workpieces.
- Explore variable speed settings for optimal material cutting.
Maintenance and Repair
Regular maintenance ensures optimal performance. Lubricate moving parts and check blade alignment. Inspect the fence and miter gauge for accuracy. Refer to the parts list for repairs.
- Lubricate all moving parts regularly.
- Check and adjust blade alignment.
- Inspect the rip fence for proper alignment.
- Refer to the parts list for repair needs.
4.1 Regular Maintenance Tasks
Perform regular maintenance to ensure optimal performance. Lubricate moving parts, inspect the blade for dullness, and check alignment. Clean the table and fence regularly. Tighten loose bolts and inspect belts for wear. Refer to the parts list for replacement needs. Schedule maintenance every 50 hours of use for longevity.
- Lubricate all moving parts periodically.
- Inspect and sharpen or replace the blade as needed.
- Check and adjust the fence alignment.
- Clean the saw table and remove debris.
- Inspect belts and pulleys for wear or damage.

4.2 Troubleshooting Common Issues
Address common issues promptly to ensure smooth operation. Check for blade alignment if cuts are uneven. Inspect the motor for overheating due to overload. Lubricate moving parts if the saw binds. Refer to the parts list for replacements. Consult the manual or contact customer support for unresolved problems.
- Uneven cuts: Adjust blade alignment.
- Motor overheating: Reduce workload.
- Binding: Lubricate or clean parts.
- Blade issues: Sharpen or replace.
4.3 Replacement Parts and Repairs
Replace worn or damaged parts promptly to maintain performance. Order genuine Craftsman parts using the provided diagrams and part numbers. Follow manual instructions for safe repairs. Contact customer support for complex fixes. Regular maintenance prevents costly repairs.
- Refer to the exploded view for part identification.
- Order replacements using the correct part numbers.
- Ensure proper alignment during reassembly.
- Consult the manual for repair guidelines.

Parts List and Diagrams
Refer to the exploded view for detailed part identification. Use the provided diagrams to locate and order replacement parts by their specific numbers. This ensures accuracy when servicing your table saw.
5.1 Key Components of the Table Saw
The Craftsman table saw features a robust cast iron table, precision-ground for accuracy. Key components include the powerful motor, adjustable rip fence, miter gauge, and blade guard. The saw also includes a bevel locking lever, push stick, and dust collection port for efficient operation. Always refer to the exploded view for part identification;
5.2 Exploded View and Part Numbers
The exploded view diagram in the manual provides a detailed visual breakdown of the table saw’s components. Each part is labeled with corresponding numbers, making identification easy. Refer to the parts list for exact numbers when ordering replacements. This ensures accuracy and simplifies maintenance or repairs. Always order by part number for compatibility.
- Use the exploded view to locate specific components.
- Match part numbers to the parts list for ordering.
- Ensure compatibility by ordering exact replacements.
5.3 Ordering Replacement Parts
To order replacement parts for your Craftsman table saw, visit Sears Parts Direct or refer to the parts list in the manual. Ensure to use the exact part numbers from the exploded view diagram. Verify compatibility with your model number before placing an order. Contact customer support for assistance if needed.
- Use Sears Parts Direct for genuine parts.
- Order by part number for accuracy.
- Check the exploded view for correct identification.
- Confirm compatibility with your model number.

Warranty Information
Craftsman table saws are backed by a one-year warranty covering defects in material and workmanship. Exclusions apply for normal wear, misuse, or improper maintenance. Register your product and retain proof of purchase for warranty claims.
- Covers defects in material and workmanship.
- Excludes normal wear and misuse.
- Proof of purchase is required.
6.1 Warranty Coverage Details
Craftsman table saws are covered by a one-year warranty from the date of purchase, protecting against defects in materials and workmanship. This warranty excludes normal wear, misuse, or improper maintenance. Proper registration and proof of purchase are required for warranty claims. Coverage applies to original owners only.
- Covers defects in materials and workmanship.
- Excludes normal wear and misuse.
- Valid for one year from purchase date.
- Proof of purchase is required.
6.2 Filing a Warranty Claim
To file a warranty claim, contact Craftsman customer support at 1-800-488-1222 or visit their official website. Provide proof of purchase, model number, and a detailed description of the issue. Claims are processed promptly, ensuring repairs or replacements are handled efficiently within warranty terms.
- Contact customer support via phone or website.
- Provide proof of purchase and model number.
- Describe the issue clearly for prompt resolution.
6.3 Exclusions and Limitations
The warranty excludes damage caused by misuse, neglect, or normal wear and tear. It does not cover alterations or repairs performed without Craftsman’s authorization. Use of non-recommended accessories may void the warranty. Ensure all safety guidelines are followed to maintain warranty validity and avoid exclusion of claims.
- Misuse or neglect voids warranty coverage.
- Unauthorized repairs are not covered.
- Non-recommended accessories may invalidate claims.

Accessories and Upgrades
Explore recommended accessories like blade guards, rip fences, and push sticks to enhance functionality. Optional upgrades include motor enhancements and dust collection systems for improved performance and workshop efficiency.
- Blade guards for safer operations.
- Rip fences for precise cuts.
- Push sticks for handling narrow stock.
7.1 Recommended Accessories
Enhance your table saw’s performance with essential accessories like blade guards, rip fences, and push sticks. Consider adding miter gauges for precise angled cuts and dust collection systems for a cleaner workspace. These upgrades improve functionality, safety, and overall efficiency, ensuring optimal results for various woodworking projects.
- Blade guards for enhanced safety.
- Rip fences for accurate straight cuts.
- Push sticks for safe stock handling.
- Miter gauges for precise angles.
- Dust collection systems for reduced debris.

7.2 Upgrading Your Table Saw
Enhance your table saw’s performance with upgrades like high-quality blades, precision fences, or advanced dust collection systems. Consider adding a digital readout for accurate measurements or a motor upgrade for increased power. Always use genuine Craftsman parts for compatibility and reliability. Visit Sears Parts Direct for authorized upgrades and accessories.
- High-quality blades for smoother cuts.
- Precision fences for improved accuracy.
- Digital readouts for precise measurements.
- Motor upgrades for increased power.
7.3 Compatible Add-Ons
Enhance your Craftsman table saw with compatible add-ons for optimal performance. Consider a precision rip fence, miter gauge, or blade guard. These accessories ensure accuracy and safety. Refer to your model’s parts list, such as 113.298720, for specific compatibility. Visit Sears Parts Direct for genuine parts.
- Precision rip fence for accurate cuts.
- Miter gauge for angled precision.
- Blade guard for enhanced safety.
- Model-specific parts for compatibility.

Downloading the Manual
Download the Craftsman table saw manual from Sears Parts Direct or the official Craftsman website. Models like 113.298720 are available as free PDF downloads for easy access.
8.1 Official Sources for the Manual
Access the official Craftsman table saw manual through Sears Parts Direct or the Craftsman website. These sources provide PDF downloads for models like 113.298720 and 137.218071, ensuring authenticity and comprehensive guidance for safe operation, maintenance, and troubleshooting. Visit www.sears.com/craftsman for direct access.
8.2 How to Download the PDF
To download the Craftsman table saw manual, visit Sears Parts Direct or the official Craftsman website. Search for your model number, select the manual, and click the download link. Create an account if required. Save the PDF for easy access and reference. Ensure the file is complete before printing or sharing.
8.3 Troubleshooting Manual Access
If you cannot access the manual, ensure you’re using the correct model number. Visit Sears Parts Direct or the official Craftsman website. Verify your account registration and check for email notifications. Clear your browser cache or try a different device. Contact Craftsman customer support for assistance if issues persist.
Proper use and regular maintenance ensure optimal performance. Stay updated with Craftsman resources for the latest guides and support. Contact customer support for any further assistance needed.
9.1 Final Tips for Optimal Use
For optimal performance, regularly lubricate moving parts and keep the table clean. Always use the blade guard and recommended accessories. Store the saw in a dry place and follow maintenance schedules. Proper alignment and sharp blades ensure precise cuts. Refer to the manual for specific guidelines to extend the tool’s lifespan and ensure safety.
9.2 Staying Updated with Manufacturer Resources
Visit the official Craftsman website and Sears Parts Direct for updates, manuals, and repair guides. Register your product for exclusive access to resources and notifications. Check for firmware updates and subscribe to newsletters for the latest tips and safety guidelines. This ensures optimal performance and safety of your table saw.
- Explore authorized dealers for genuine parts and accessories.
- Contact customer support for personalized assistance and troubleshooting.
9.3 Contacting Customer Support
For assistance with your Craftsman table saw, contact customer support toll-free at 1-800-488-1222. Visit the official Craftsman website for live chat, email support, or to find local service centers. Refer to your manual for troubleshooting guides before reaching out for faster resolution.
- Have your model number ready for efficient service.