Singer Stitch Sew Quick Manual: A Comprehensive Guide (Updated 04/01/2026)
Welcome! This detailed manual‚ updated today – 04/01/2026 – assists you in mastering your new Singer Stitch Sew Quick‚ offering comprehensive guidance for optimal use.
Congratulations on acquiring the Singer Stitch Sew Quick! This sewing machine is designed to be a versatile and user-friendly companion for both beginner and experienced sewists. This manual serves as your comprehensive guide‚ unlocking the full potential of your new machine. We understand that starting with a new sewing machine can feel daunting‚ but rest assured‚ the Stitch Sew Quick is engineered for simplicity and efficiency.
This introduction will briefly outline the machine’s capabilities and the structure of this manual. You’ll discover how to perform basic and advanced sewing techniques‚ troubleshoot common issues‚ and maintain your machine for years of reliable service. The Singer Stitch Sew Quick isn’t just a machine; it’s a gateway to creativity‚ allowing you to bring your sewing visions to life. We’ve included detailed instructions and helpful tips‚ referencing today’s date‚ 04/01/2026‚ for the most current information. Prepare to embark on a rewarding sewing journey!
What’s Included in the Box?
Upon opening your Singer Stitch Sew Quick box (dated 04/01/2026 for reference)‚ you should find the following components carefully packaged to ensure safe delivery. First‚ the Singer Stitch Sew Quick sewing machine itself‚ ready for setup. Included are several presser feet – a general-purpose foot‚ a zipper foot‚ and a buttonhole foot – to tackle diverse projects. You’ll also receive a set of needles in assorted sizes‚ catering to various fabric weights;
Furthermore‚ the box contains a supply of bobbins‚ a bobbin winder‚ a seam ripper for correcting mistakes‚ and a screwdriver for basic maintenance. A power cord is included‚ along with this comprehensive instruction manual (updated 04/01/2026). Finally‚ a dust cover protects your machine when not in use. Please verify that all these items are present before proceeding. If anything is missing‚ contact Singer customer support immediately for assistance.
Understanding the Machine’s Components
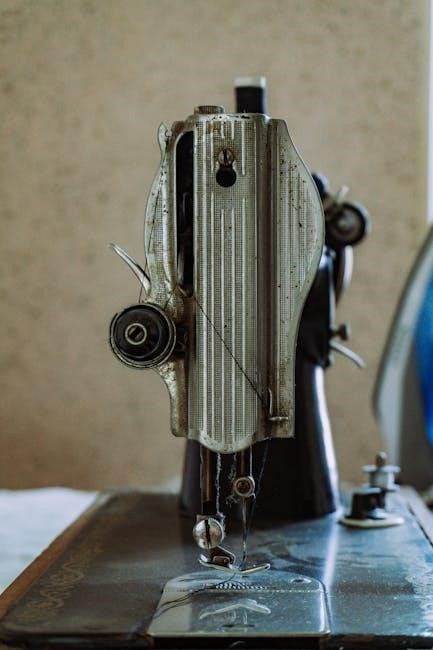
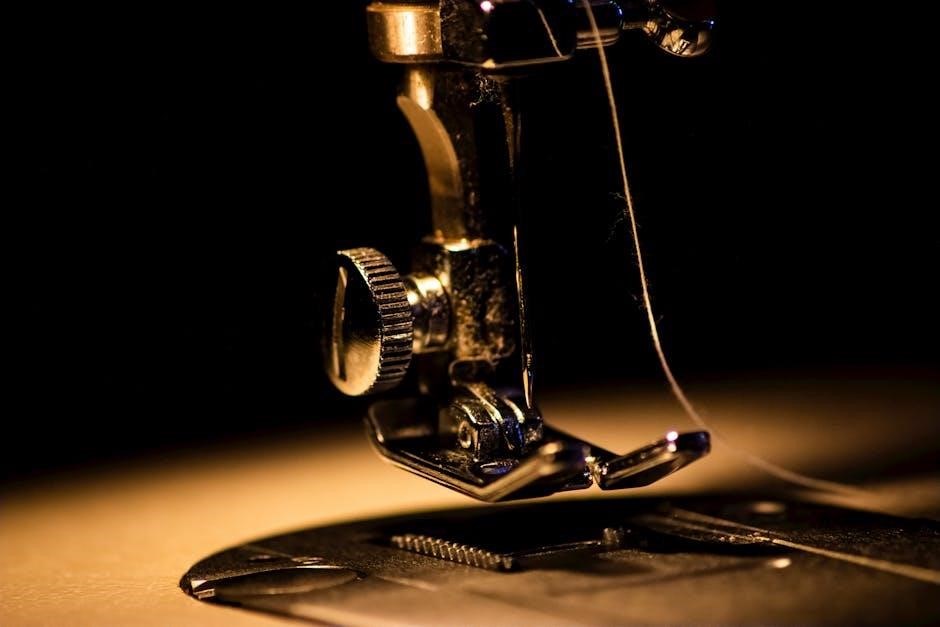
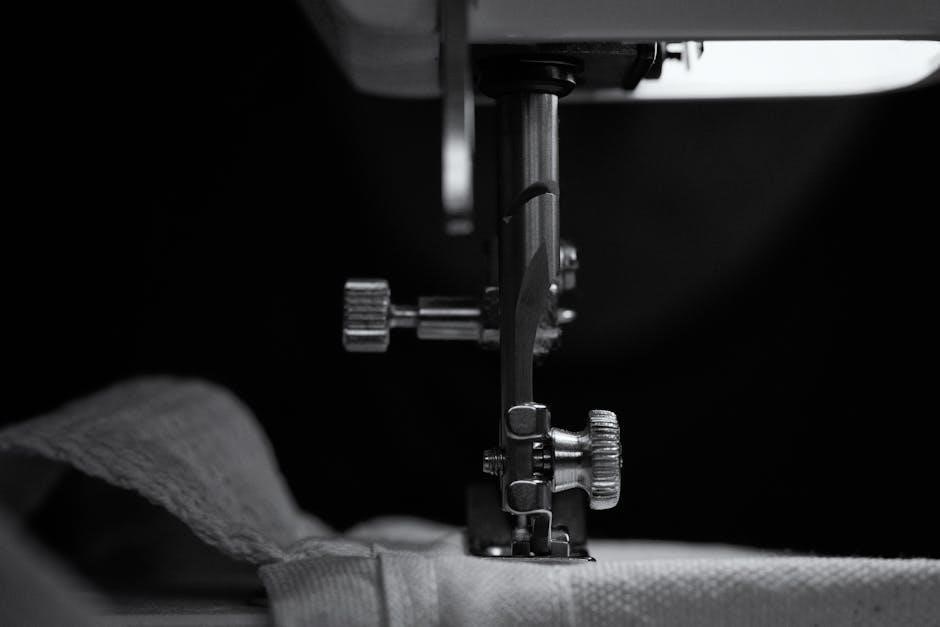
The Singer Stitch Sew Quick‚ as of its updated manual date of 04/01/2026‚ features several key components. The power switch initiates operation‚ while the speed control allows for precise stitching. The handwheel provides manual control‚ useful for intricate work. The stitch selection dial lets you choose from a variety of stitch patterns. Observe the stitch length dial and stitch width dial for customizing your stitches.
The presser foot secures fabric during sewing‚ and the presser foot lever raises and lowers it. The bobbin winder prepares bobbins for use‚ and the bobbin case holds the bobbin. The needle clamp secures the needle‚ and the thread tension dial adjusts thread tightness. Familiarize yourself with the reverse lever for reinforcing seams. Understanding these components is crucial for effective operation and maintenance of your Singer machine.
Key Features and Benefits
The Singer Stitch Sew Quick‚ as detailed in this comprehensive guide updated 04/01/2026‚ boasts several standout features. Its lightweight design ensures portability and ease of use. The machine offers a variety of stitch options‚ catering to diverse sewing projects. A key benefit is its user-friendly interface‚ making it ideal for beginners.
Furthermore‚ the Stitch Sew Quick provides adjustable stitch length and width for customization. The automatic needle threader saves time and frustration. Its durable construction guarantees longevity‚ while the free arm facilitates cuff and sleeve sewing. Enjoy the convenience of easy bobbin winding and a built-in accessory storage. These features combine to deliver a powerful‚ versatile‚ and enjoyable sewing experience‚ making it a valuable addition to any crafter’s toolkit.
Safety Precautions
Important Safety Instructions: Always disconnect the power supply before threading‚ changing the needle‚ or performing any maintenance on your Singer Stitch Sew Quick (updated 04/01/2026). Never sew over pins or thick fabric layers‚ as this can damage the needle and machine. Keep fingers away from the needle area while operating.
Electrical Safety: Ensure the voltage indicated on the machine matches your power supply. Do not use the machine with a damaged cord or plug. Avoid operating the machine in damp environments. Personal Safety: Wear appropriate eye protection. Never reach under the presser foot while the machine is running. Supervise children when the machine is in use. Store the machine out of reach of children. Following these precautions will ensure safe and enjoyable operation of your sewing machine.
Setting Up Your Machine
Initial Setup: Begin by placing your Singer Stitch Sew Quick (updated 04/01/2026) on a stable‚ flat surface with adequate lighting. Ensure the power switch is in the ‘off’ position. Attach the power cord securely. Next‚ install the bobbin case‚ following the diagram in this manual – proper bobbin insertion is crucial for smooth operation.
Attaching the Presser Foot: Select the appropriate presser foot for your intended sewing project (standard foot is pre-installed). Gently lower the presser foot lever. Adjust the presser foot pressure according to the fabric type; lighter fabrics require lower pressure. Finally‚ connect the power cord to a grounded outlet. Your machine is now ready for threading and initial testing. Refer to the threading guide for detailed instructions.
Threading the Singer Stitch Sew Quick
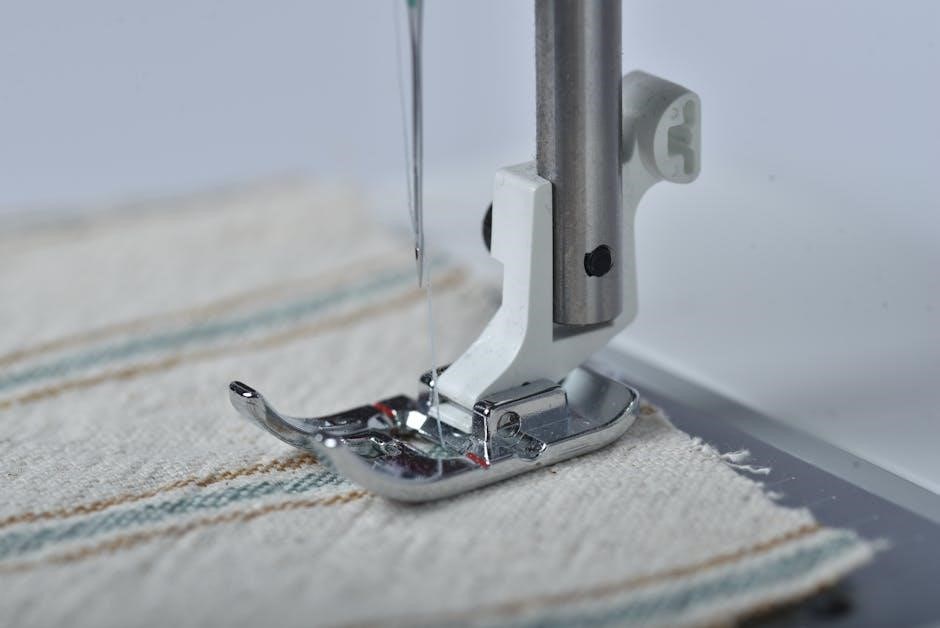
Upper Threading: Begin with the machine turned off (updated 04/01/2026). Raise the presser foot lever. Place the spool of thread on the spool pin‚ securing it with the spool cap. Guide the thread through the first thread guide‚ then down and around the tension disc – ensure the thread snaps into the disc groove. Next‚ lead the thread up and through the take-up lever‚ and then down through the needle clamp.
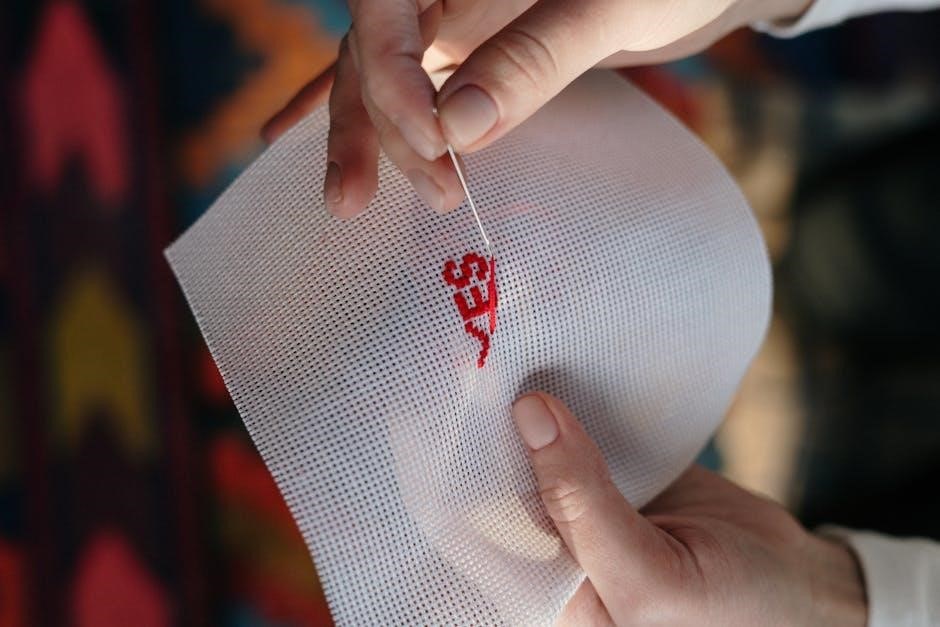
Needle Threading: Thread the needle from front to back. A needle threader can be helpful! Finally‚ draw approximately 4-6 inches of thread through the needle eye. Proper threading is vital for consistent stitch quality. Incorrect threading can cause skipped stitches or thread breakage. Always re-thread if experiencing issues. Refer to the detailed threading diagram included in this manual for visual assistance.
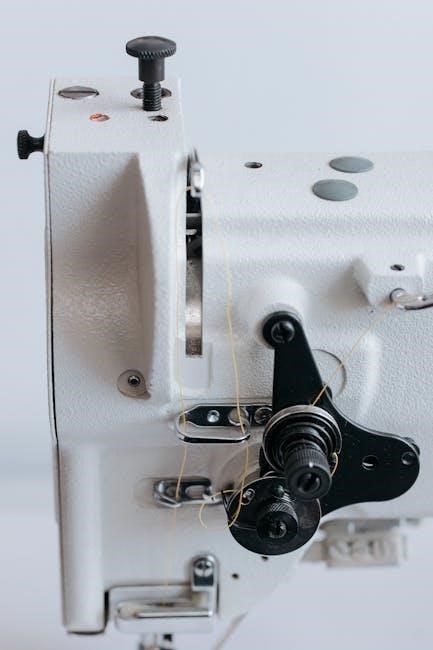
Winding the Bobbin
Preparing to Wind: Place a spool of thread onto the spool pin‚ securing it with the cap (updated 04/01/2026). Position the bobbin onto the bobbin winder spindle. Guide the thread from the spool‚ through the thread guide‚ and then wrap it several times around the bobbin – manually‚ to begin.
Engaging the Winder: Gently push the bobbin winder spindle to the right to engage the winding mechanism. Press the foot pedal to start winding. The machine will automatically stop when the bobbin is full. Ensure the thread isn’t too tight or loose during winding. A consistently wound bobbin is crucial for even stitching. If the bobbin doesn’t wind correctly‚ check the thread path and ensure the bobbin is properly seated. Always use quality thread for optimal results.
Basic Sewing Techniques
Getting Started: Before beginning any project (updated 04/01/2026)‚ practice on scrap fabric! This allows you to familiarize yourself with the machine’s settings and develop control. Always remember to raise the presser foot before placing or removing fabric. Lower it before starting to sew;
Holding the Fabric: Gently guide the fabric with both hands‚ maintaining a consistent speed. Avoid pulling or pushing the fabric; let the machine do the work. Keep your fingers a safe distance from the needle. A smooth‚ even feed is key to achieving professional-looking seams. Practice maintaining a consistent seam allowance; Understanding fabric grain is also vital for successful sewing – always align patterns accordingly. Mastering these basics will build a strong foundation for more complex projects.
Straight Stitching: A Step-by-Step Guide
Preparation (Updated 04/01/2026): First‚ ensure your Singer Stitch Sew Quick is correctly threaded (refer to the threading section) and bobbin is wound. Select a straight stitch setting – typically position ‘0’ on the stitch selector dial. Choose your desired stitch length; a medium length (2.5mm) is ideal for general sewing.
Sewing Process: Place your fabric under the presser foot‚ aligning the edge with the desired seam allowance guide on the needle plate. Lower the presser foot. Gently depress the foot pedal to begin sewing. Guide the fabric smoothly‚ maintaining a consistent speed. Avoid pulling or pushing. Backstitch at the beginning and end of the seam to secure the stitches. Lift the presser foot and remove the fabric. Inspect your seam – consistent stitch length indicates success! Practice makes perfect; don’t be afraid to experiment.
Zigzag Stitching: Applications and Settings
Understanding Zigzag (Updated 04/01/2026): The zigzag stitch offers versatility beyond straight sewing. It’s ideal for finishing raw edges to prevent fraying‚ creating decorative effects‚ and sewing stretch fabrics. On your Singer Stitch Sew Quick‚ select the zigzag stitch setting on the stitch selector dial.
Adjusting Settings: Zigzag stitch width controls how wide the stitch is; a wider width is suitable for decorative applications‚ while a narrower width is better for edge finishing. Stitch length also impacts the appearance – shorter lengths create denser stitches. Experiment with different width and length combinations on scrap fabric. For stretch fabrics‚ use a slightly longer stitch length to allow for fabric movement. Remember to test your settings before sewing your final project. Zigzag is a powerful tool for creative and functional sewing!
Adjusting Stitch Length and Width
Fine-Tuning Your Stitches (Updated 04/01/2026): Mastering stitch length and width is crucial for achieving professional results with your Singer Stitch Sew Quick. These adjustments directly impact the strength‚ appearance‚ and suitability of your stitches for different fabrics and applications. Locate the stitch length dial – typically marked with numbers indicating millimeters – and the stitch width slider.
Understanding the Controls: A shorter stitch length (lower number) creates a denser‚ stronger stitch‚ ideal for heavy-duty fabrics or areas requiring extra reinforcement. Longer stitch lengths (higher numbers) are better suited for basting or lightweight fabrics. Stitch width controls the side-to-side deviation of the needle; Wider widths are used for decorative stitches and stretch fabrics‚ while narrower widths are for standard sewing. Always test adjustments on scrap fabric before starting your project to ensure optimal results.
Advanced Stitching Options
Exploring Creative Possibilities (Updated 04/01/2026): Beyond basic stitches‚ your Singer Stitch Sew Quick unlocks a world of advanced techniques. These options allow for intricate designs and specialized applications‚ elevating your sewing projects. Explore the variety of pre-programmed stitches – often categorized as utility‚ decorative‚ and stretch stitches – accessible via the stitch selection dial.
Utilizing Specialized Stitches: Experiment with overcasting stitches to prevent fabric fraying‚ blind hem stitches for invisible hems‚ and reinforced buttonhole stitches for durable closures. The manual provides detailed diagrams and recommended settings for each stitch. Don’t hesitate to utilize the adjustable needle position feature for precise control‚ particularly when sewing curves or along edges. Remember to always test new stitches on scrap fabric to familiarize yourself with their characteristics and ensure desired outcomes.

Decorative Stitching: Exploring the Possibilities
Unleash Your Creativity (Updated 04/01/2026): The Singer Stitch Sew Quick boasts a diverse range of decorative stitches‚ transforming ordinary projects into personalized masterpieces. These stitches add visual interest to garments‚ home décor‚ and quilting projects. Access these options through the stitch selection dial‚ referencing the stitch chart in your manual for pattern previews.
Techniques and Applications: Experiment with floral motifs‚ geometric patterns‚ and scallop designs. Utilize varying stitch widths and lengths to alter the appearance of each stitch. Consider combining decorative stitches with appliqué techniques for unique embellishments. Stabilizers are often recommended when using dense decorative stitches to prevent fabric puckering. Remember to test stitch settings on scrap fabric before applying them to your final project. Explore online resources and sewing communities for inspiration and innovative decorative stitching ideas!
Buttonhole Stitching: A Detailed Walkthrough
Perfect Buttonholes Every Time (Updated 04/01/2026): The Singer Stitch Sew Quick simplifies buttonhole creation with its dedicated buttonhole foot and pre-programmed stitch settings. Begin by attaching the buttonhole foot. Consult your manual’s stitch chart to select the appropriate buttonhole style for your button size. Measure the button diameter accurately; this dictates the buttonhole length.
Step-by-Step Guide: Place the buttonhole stabilizer (recommended) behind your fabric. Align the fabric under the buttonhole foot‚ ensuring the starting point is correctly positioned. Lower the presser foot and begin stitching – the machine automatically creates the buttonhole bars. Carefully clip the threads between the bars‚ avoiding fabric cuts. Finally‚ reinforce the buttonhole ends with a few backstitches. Practice on scrap fabric to master the technique before tackling your project. Consistent results require precise measurements and proper stabilizer use.
Zipper Insertion: Techniques for Beginners
Mastering Zipper Application (Updated 04/01/2026): Inserting zippers can seem daunting‚ but the Singer Stitch Sew Quick offers features to streamline the process. Utilize the zipper foot – its specialized design allows close stitching along the zipper teeth. Begin by preparing your fabric pieces‚ interfacing the zipper area for stability. Pin the zipper tape to the right side of the fabric‚ aligning the zipper teeth with the fabric edge.
A Simple Approach: Using a zipper foot‚ stitch close to the zipper teeth‚ removing pins as you sew. Repeat on the other side of the zipper. For a centered zipper‚ ensure equal fabric width on both sides. When inserting a lapped zipper‚ fold the fabric under and stitch‚ creating a clean finish. Practice on scrap fabric to build confidence. Remember to backstitch at the beginning and end of each seam for durability. Consistent pressure and a slow‚ steady pace are key to success.
Troubleshooting Common Issues
Addressing Sewing Challenges (Updated 04/01/2026): Even with a reliable machine like the Singer Stitch Sew Quick‚ occasional issues can arise. This section provides solutions to common problems. If your machine isn’t powering on‚ first check the power cord and ensure it’s securely connected. Verify the power switch is in the ‘on’ position and the foot pedal is properly plugged in. For thread jamming‚ re-thread the machine‚ ensuring the thread is correctly seated in all tension discs and guides.
Quick Fixes: Needle breakage often stems from using the wrong needle type for the fabric or bent needles. Always use a new needle for each project. If stitches are skipping‚ try a different needle or adjust the tension. Regularly cleaning and lubricating your machine (see Maintenance section) can prevent many issues. Consult the full manual for detailed diagrams and further assistance. Remember to always unplug the machine before performing any maintenance.
Needle Breakage: Causes and Solutions
Understanding and Preventing Needle Breaks (Updated 04/01/2026): A broken needle can halt your sewing progress‚ but understanding the causes can prevent recurrence. The most frequent culprit is using an incorrect needle type for the fabric weight. Lightweight fabrics require finer needles (sizes 60/8 to 80/12)‚ while heavier materials demand stronger needles (sizes 90/14 to 110/18).
Troubleshooting Steps: Bent or damaged needles are another common cause; always replace a bent needle immediately. Incorrect threading‚ pulling the fabric while sewing‚ or hitting a pin can also lead to breakage. Ensure proper threading and avoid forcing the fabric. Regularly check the needle plate for obstructions. Always use high-quality needles designed for your Singer Stitch Sew Quick. If breakage persists‚ verify the timing of your machine – a professional service may be needed. Remember to always unplug the machine before changing the needle.
Thread Jamming: How to Resolve It
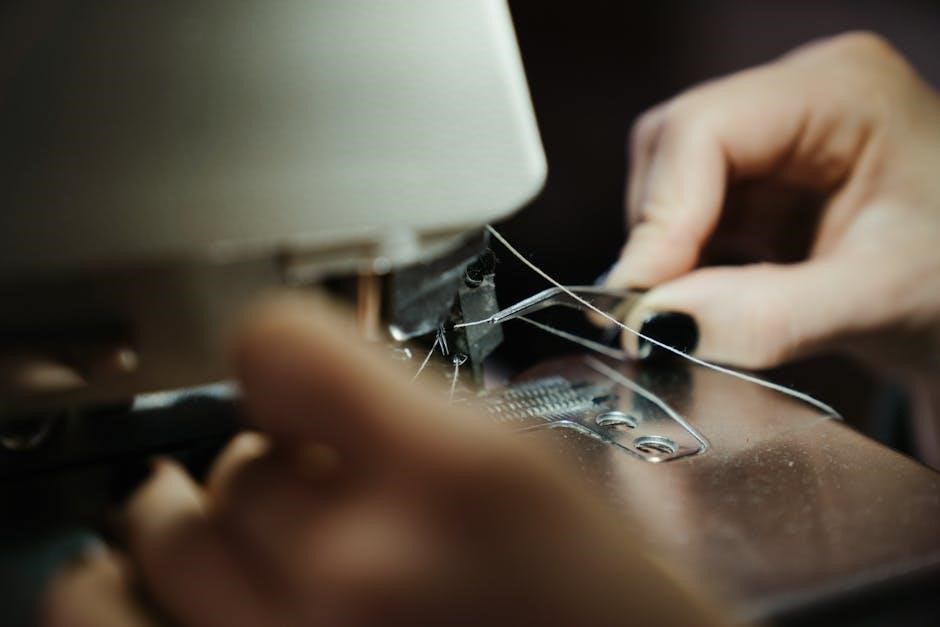
Addressing Thread Jams (Updated 04/01/2026): Thread jamming is a common sewing frustration‚ but often easily resolved. The primary cause is usually improper threading – meticulously re-thread both the upper thread and the bobbin‚ ensuring the thread is securely seated in all tension discs and guides. Incorrect bobbin winding can also contribute; rewind the bobbin evenly and not too tightly.
Step-by-Step Resolution: If jamming occurs‚ stop immediately and raise the presser foot. Gently remove the jammed thread‚ avoiding forceful pulling which can damage the machine. Clean the bobbin area thoroughly‚ removing any lint or debris. Check the needle for bends or damage. Ensure you’re using the correct thread type and weight for your fabric. Finally‚ re-test with a scrap fabric piece. If the issue persists‚ consult the machine’s detailed diagrams for correct threading paths.
Machine Not Powering On: Diagnostic Steps
Troubleshooting Power Issues (Updated 04/01/2026): If your Singer Stitch Sew Quick fails to power on‚ begin with the simplest checks. First‚ confirm the power cord is securely plugged into both the machine and a functioning wall outlet. Test the outlet with another device to rule out an electrical issue. Inspect the power cord for any visible damage – fraying or cuts – and replace if necessary.
Further Investigation: Next‚ check the machine’s on/off switch‚ ensuring it’s fully engaged. Some models have a separate power switch in addition to the foot pedal; verify this is also switched on. If using a foot pedal‚ ensure it’s correctly connected to the machine. A faulty foot pedal can prevent power-up. If these steps don’t resolve the issue‚ there may be an internal electrical problem requiring professional servicing. Do not attempt to disassemble the machine yourself.
Maintenance and Care
Preserving Your Singer Stitch Sew Quick (Updated 04/01/2026): Regular maintenance is crucial for ensuring the longevity and optimal performance of your sewing machine. Consistent cleaning prevents lint and dust buildup‚ which can cause malfunctions and affect stitch quality. Always unplug the machine before performing any maintenance tasks. Use a soft brush to remove lint from the bobbin area‚ feed dogs‚ and other accessible parts.
Lubrication is Key: Periodic lubrication‚ as detailed in the ‘Lubrication’ section‚ keeps moving parts running smoothly. Avoid using oil excessively‚ as this can attract dust. Store your machine covered when not in use to protect it from dust and debris. Proper storage and careful handling during transportation will also contribute to its lifespan. Following these simple steps will keep your Singer Stitch Sew Quick in excellent working condition for years to come.
Cleaning Your Singer Stitch Sew Quick
Maintaining a Pristine Machine (Updated 04/01/2026): Regular cleaning is paramount to the smooth operation of your Singer Stitch Sew Quick. Before commencing‚ always disconnect the power supply to prevent accidental activation. Begin by removing the needle and presser foot. Utilize a soft-bristled brush to gently dislodge lint and thread fragments from the bobbin area‚ feed dogs‚ and around the stitch plate.
Detailed Cleaning Steps: A lint brush is ideal for reaching tight spaces. For stubborn lint‚ a small vacuum attachment can be employed with caution. Wipe down the exterior surfaces with a slightly damp cloth – avoid harsh chemicals or abrasive cleaners. Pay particular attention to areas where oil may accumulate. Consistent cleaning prevents jams‚ ensures accurate stitching‚ and extends the life of your valuable sewing companion. Remember to re-oil after cleaning‚ as detailed in the lubrication section.
Lubrication: Keeping Your Machine Running Smoothly
Optimal Performance Through Lubrication (Updated 04/01/2026): Proper lubrication is crucial for maintaining the Singer Stitch Sew Quick’s performance and longevity. Always refer to the diagram within this manual for designated oiling points – excessive oil can be as detrimental as insufficient lubrication. Use only sewing machine oil; other lubricants may damage internal components.
Detailed Lubrication Guide: Apply a small drop of oil to the bobbin case hinge‚ the shuttle race‚ and the motor shaft (if accessible). Gently operate the handwheel to distribute the oil evenly. Avoid oiling the feed dogs or tension discs‚ as this can attract lint and cause issues. Lubricate after every 8 hours of sewing or as needed‚ particularly if you notice increased noise or resistance. Regular oiling ensures smooth‚ quiet operation and prevents wear and tear‚ safeguarding your investment for years to come.
Storage and Transportation
Protecting Your Investment (Updated 04/01/2026): Proper storage and transportation are vital to preserving the Singer Stitch Sew Quick’s condition and functionality. When not in use‚ always cover the machine with the dust cover provided to shield it from dust‚ debris‚ and potential damage.
Safe Transport Guidelines: For transportation‚ repack the machine in its original packaging whenever possible. If the original packaging isn’t available‚ use a sturdy box with ample padding to protect against shocks and vibrations. Secure the machine to prevent shifting during transit. Never attempt to transport the machine without adequate protection. Store in a dry‚ climate-controlled environment‚ avoiding extreme temperatures and humidity. Regularly check for any signs of damage after transportation‚ and consult the troubleshooting section if needed. Careful handling ensures your machine arrives safely and remains in excellent working order.
Resources and Support
Extensive Help Awaits (Updated 04/01/2026): Singer provides a wealth of resources to support your sewing journey with the Stitch Sew Quick. Our official website‚ www.singer.com‚ features a comprehensive FAQ section‚ downloadable manuals (including this one!)‚ and helpful video tutorials covering everything from basic operation to advanced techniques.
Connect with the Community: Join our vibrant online community forum to connect with fellow sewing enthusiasts‚ share projects‚ and ask questions. For personalized assistance‚ our dedicated customer support team is available via phone at 1-800-4SINGER (1-800-474-6437) or through live chat on our website. Don’t hesitate to reach out – we’re here to help you unlock the full potential of your machine. Remember to have your machine’s model number and serial number readily available when contacting support for faster service. We are committed to your sewing success!