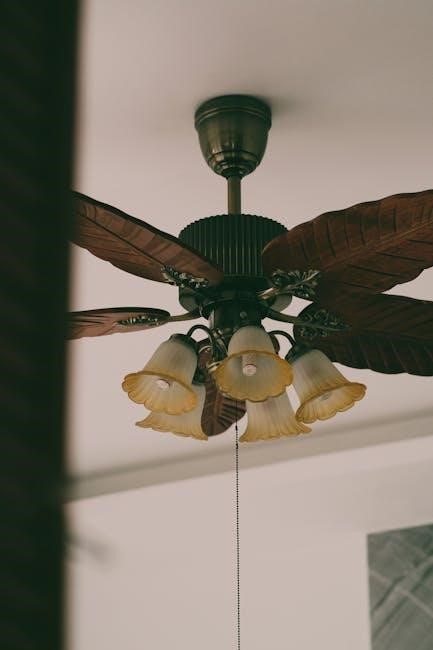
Hunter Ceiling Fan Manuals provide essential guidance for installing, operating, and maintaining your fan․ They include detailed instructions, troubleshooting tips, and safety precautions to ensure optimal performance and longevity of your ceiling fan․
These manuals are designed to help users understand their fan’s features, such as speed settings and light kits, while also offering solutions for common issues․ They are a vital resource for both installation and everyday use․
Installation Guide for Hunter Ceiling Fans
The installation guide provides step-by-step instructions for mounting your Hunter ceiling fan, including standard, angled, and flush mount methods․ It outlines required tools and parts, ensuring a safe and proper setup for optimal performance․
2․1․ Step-by-Step Installation Instructions
Begin by turning off the power to the circuit at the electrical panel․ Remove any existing ceiling fixtures and carefully lower them․ Install the provided Hunter mounting bracket securely to the ceiling junction box using the screws provided in the kit․ Ensure the bracket is tightly fastened to support the fan’s weight․
Next, attach the fan’s motor housing to the mounting bracket․ Align the screws and tighten them firmly․ Connect the wiring according to the manual’s wiring diagram, ensuring black (hot) wires connect to black wires and white (neutral) wires to white wires․ Secure any excess wire and tuck it into the housing․
Attach the fan blades to the motor housing using the provided screws․ Ensure they are evenly spaced and tightly secured․ Install the light kit if applicable, following the manual’s instructions․ Finally, turn the power back on and test the fan’s operation at all speed settings to confirm proper installation․
2․2․ Required Tools and Parts for Installation
To successfully install your Hunter ceiling fan, gather the necessary tools and parts․ Required tools include a screwdriver (both flathead and Phillips), adjustable pliers, wire cutters, and a voltage tester․ Ensure you have a ladder or step stool for safe access to the ceiling․
The installation kit typically includes a mounting bracket, screws for securing the bracket to the ceiling, and hardware for attaching the fan motor to the bracket․ Additional parts may include blade screws, a downrod (depending on fan model), and wiring connectors․ Always use the parts provided in the box to ensure compatibility and safety․

For fans with light kits, you may need extra tools like a wrench for glass shade installation․ Refer to your specific fan model’s manual for any specialized tools or parts required․ Having all tools and parts ready ensures a smooth and efficient installation process․
2․3․ Different Mounting Methods (Standard, Angled, Flush Mount)
Hunter ceiling fans offer versatile mounting options to suit various ceiling types and room designs․ The standard mounting method is the most common, ideal for flat ceilings, and involves attaching the fan directly to the ceiling bracket using the provided hardware․ For angled or sloped ceilings, Hunter fans can be installed using an angled mounting kit, ensuring stability and proper alignment․ Flush mount installation is recommended for low ceilings, as it mounts the fan closer to the ceiling, reducing clearance issues while maintaining airflow efficiency․
Each mounting method requires specific hardware, such as angled brackets or flush-mount adapters, which are typically included in the fan’s installation kit․ Always refer to the manual for model-specific instructions, as some fans may have unique mounting requirements․ Proper installation ensures safety, performance, and aesthetic appeal․

Operation and Maintenance of Hunter Ceiling Fans
Proper operation and regular maintenance ensure optimal performance and longevity of your Hunter ceiling fan․ Clean the blades and housing regularly, check balance, and use speed settings appropriately․ Refer to the manual for detailed care instructions․
3․1․ Understanding Speed Settings and Light Kits
Hunter ceiling fans are equipped with multiple speed settings to provide optimal airflow control․ These settings allow you to adjust the fan’s performance according to the room’s temperature and your personal comfort․ Most models feature a remote control or wall switch that enables easy switching between low, medium, and high speeds․
Additionally, many Hunter ceiling fans come with optional light kits, which can be installed to enhance lighting in your space․ These light kits are typically dimmable, offering flexibility in brightness levels․ The manuals provide detailed instructions on how to install and synchronize the light kits with the fan’s operation․ Understanding these features helps you maximize energy efficiency and customize the fan’s functionality to suit your needs․ Proper use of speed settings and light kits ensures a seamless user experience while maintaining the fan’s aesthetic appeal and performance․ Always refer to the manual for specific instructions tailored to your fan model․
3․2․ Cleaning and Maintaining Your Ceiling Fan
Regular cleaning and maintenance are essential to ensure your Hunter ceiling fan operates efficiently and maintains its aesthetic appeal․ Start by turning off the power to the fan at the electrical source before cleaning․ Use a soft, dry cloth or a brush specifically designed for ceiling fans to gently remove dust and debris from the blades and housing․
For more thorough cleaning, dampen a cloth with water, but avoid harsh chemicals or abrasive materials that could damage the finish․ Additionally, inspect the fan blades for any warping or damage and ensure all screws are securely tightened․ Cleaning every one to two months, depending on usage, will prevent dust buildup and maintain airflow efficiency․ Proper maintenance not only prolongs the fan’s lifespan but also ensures quiet and smooth operation․ Refer to your Hunter ceiling fan manual for specific cleaning recommendations tailored to your model․

Troubleshooting Common Issues
Troubleshooting your Hunter ceiling fan involves identifying common issues like wobbling, noise, or improper airflow․ Check blade balance, tighten loose screws, and ensure proper installation․ Consult the manual for solutions and reset options if needed․
4․1․ Common Problems and Solutions
One common issue with Hunter ceiling fans is wobbling, which can be resolved by balancing the blades or tightening loose screws․ Excessive noise may indicate worn bearings or misaligned parts, requiring lubrication or replacement․ If the fan doesn’t turn on, check the power source, circuit breaker, and remote control batteries․ For flickering lights, ensure the light kit is properly installed and bulbs are securely screwed in․ Airflow issues might be due to incorrect blade angle or blockage from nearby objects․ Regular cleaning can prevent dust buildup affecting performance․ Always refer to the manual for specific solutions tailored to your fan model․
4․2․ Resetting or Reprogramming Your Fan
Resetting or reprogramming your Hunter ceiling fan can resolve issues like improper remote control function or unexpected operation․ Start by turning off the power to the fan at the circuit breaker for 30 seconds․ Turn the power back on and test the fan’s basic functions․ For remote-controlled fans, remove batteries from the remote and receiver, then reinstall them after 10 seconds․ If the fan still malfunctions, refer to the manual for specific reprogramming instructions, as procedures may vary by model․ Some fans require syncing the remote to the receiver again or resetting the dip switches․ Always ensure the fan is properly grounded and wired to avoid resetting issues․ If problems persist, consult the troubleshooting section or contact Hunter customer support for assistance․